
About
Cheesecake is one of my favorite desserts—and for a long time, it felt slightly out of reach. It always seemed like something reserved for special occasions. Maybe it felt too difficult to make, not something that could satisfy an everyday sugar craving.
The funny thing is—it’s not that difficult! It’s actually pretty simple and requires very few ingredients.
The real challenge is the technique and the time. Cheesecake asks for a few hours of your commitment, and despite what some may tell you—you will need a water bath.
I know there are plenty of recipes out there that promise “Easiest Cheesecake Ever!” and “No Water Bath Needed!” And maybe those recipe developers are more talented than I am—totally willing to consider that possibility. But in my experience, if you want a truly classic, beautiful, silky-looking cheesecake, you need a water bath, some tin foil, and a little patience.
With that in mind, I’m going to share my Nana’s recipe for a classic cheesecake. Nana has been baking for over 50 years. She’s been a home cook, a bakery employee, a mom, a Nana, and a church bake sale volunteer. Her recipes are time-tested and taste bud approved.
I begged her to come show me how to make this cheesecake. I’ve tried making it several times over the past few years and have met with comical levels of disaster every time. I’ve made all the mistakes—skipping the water bath (as mentioned above) and even accidentally using salt instead of sugar in the filling!
I knew cheesecake required more patience than I typically exhibit, so I called in reinforcements.
This recipe is simple. Having now been guided step-by-step by my Nana (thank you for your patience with me in the kitchen!), I can promise you this: as long as you read the directions a few times and follow them carefully, you will successfully make cheesecake on your first try—unlike me. And that’s the goal of this blog.
I’ll make the mistakes, so you don’t have too.
Before You Dive In
Now, you might be a seasoned baker and not need these tips. But if you’re anything like me—someone who dives into kitchen projects with enthusiasm rather than preparation—keep reading.
1. Soften the Cream Cheese
In order to beat the cream cheese mixture properly, the cream cheese must be soft, not a cold block. I didn’t read Nana’s instructions ahead of time, and she was not pleased when she realized I hadn’t softened the cream cheese. You might not experience the “Really, Allison?” look, but you can avoid your own frustration by leaving the cream cheese out overnight.
Worst case? Set your microwave to low power and warm the cream cheese in 10-second increments. Don’t melt it—you just want it soft enough for the paddle attachment on your mixer to blend it easily with the sugar.
2. Lay Out Your Ingredients
This might be the best advice I can give. Lay out all your ingredients—measured and in order—before you turn on the mixer. It saves time and prevents disasters like skipping a step or mistaking salt for sugar.
3. Start from the Edges
This is a pro tip from Nana. When making the crust, press the mixture into the edges first. It helps create an even, compact layer all around. Note: If you have read my post on lemon tart you will know that I prefer to start from the center and work my way out with that particular style of crust. This crust calls for a different technique.
4. Fold from the Bottom Up
Even though the stand mixer does a great job incorporating ingredients, it can miss the bottom of the bowl. When working with eggs—especially—you want to ensure they’re fully mixed in. Otherwise, you might end up with a surprise bite of scrambled egg when you were expecting dessert. Use a spatula to scrape the bottom of the bowl and fold the mixture a few times to make sure nothing is missed.
Final Notes
I hope this cheesecake becomes your new go-to summer dessert. If you enjoy the recipe, feel free to drop a comment below! And if you have your own kitchen disaster stories, I’d love to hear them.
Baking can feel intimidating—there’s pressure for perfect measurements and Instagram-worthy photos—but if you’re just starting out, give yourself some grace. I’ve burned, dropped, and completely ruined more desserts than I can count. It’s all part of the process.
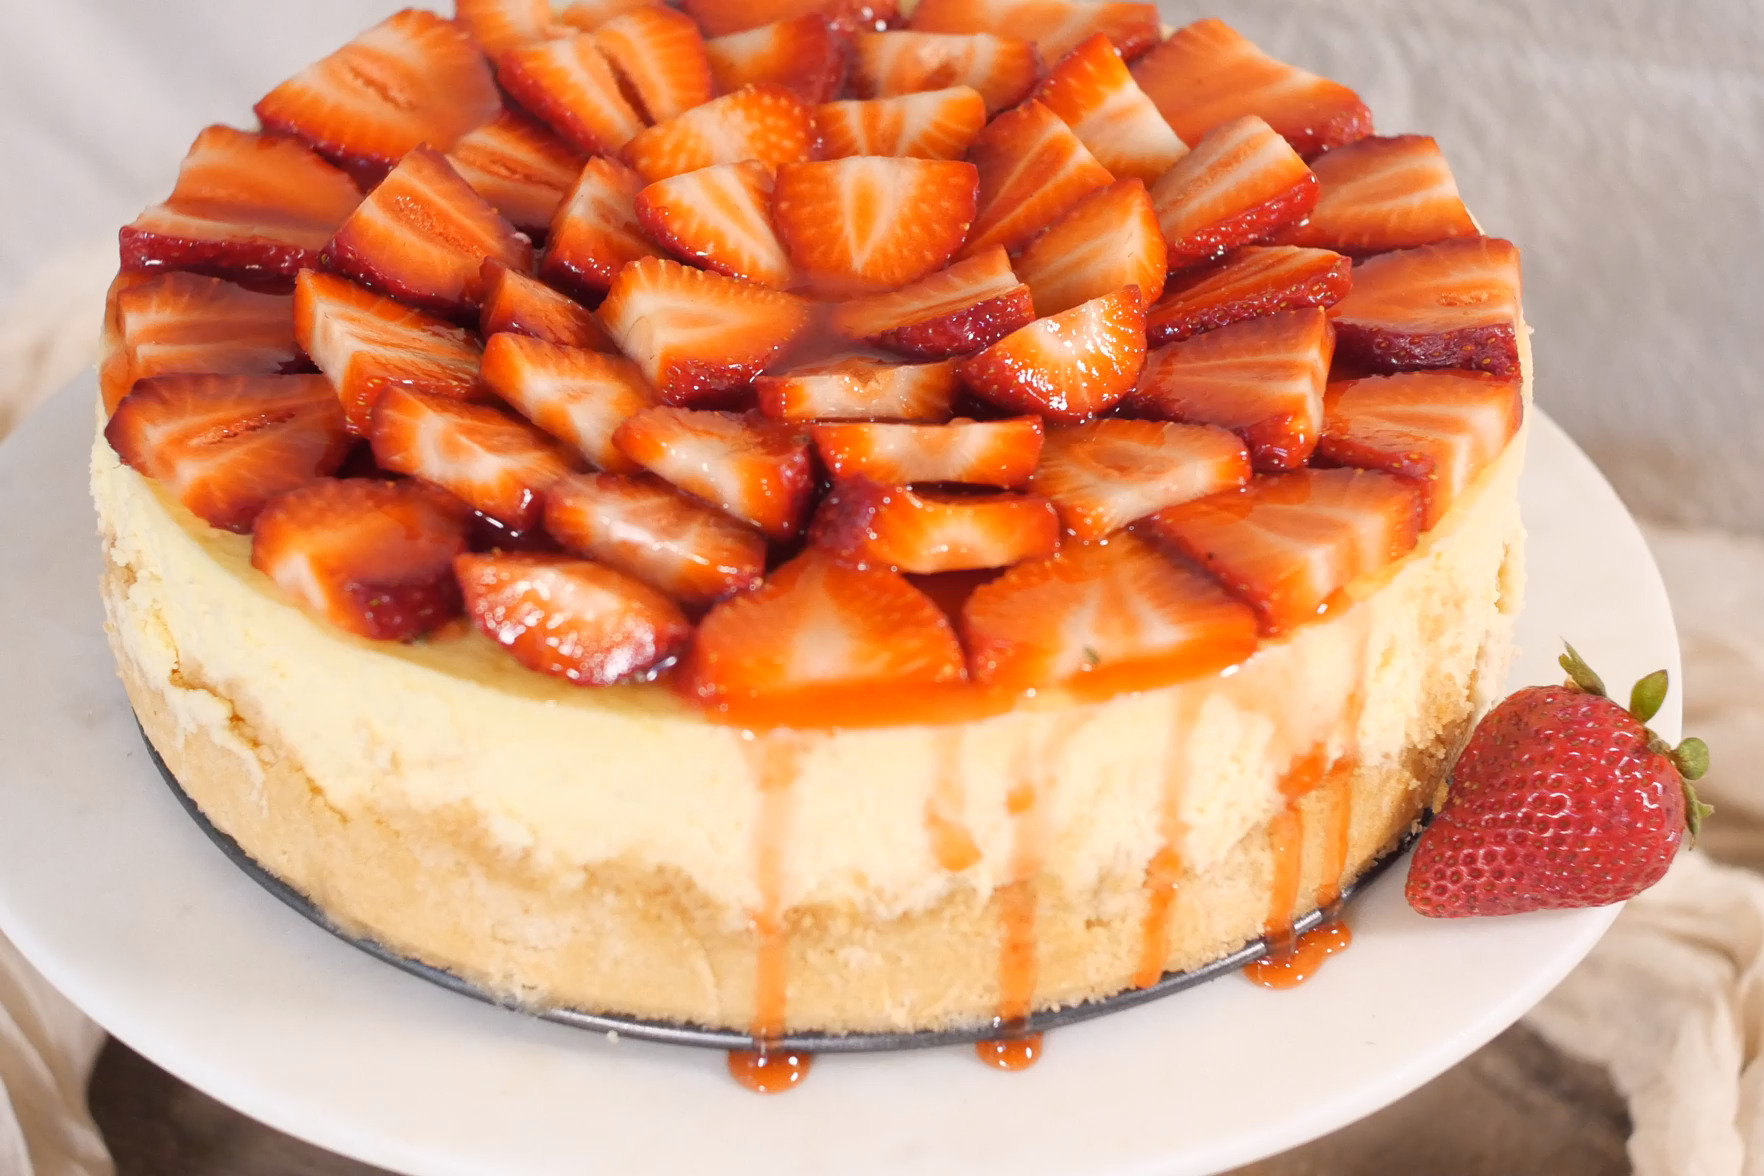
Nana’s Summer Strawberry (Gluten Free) Cheesecake Recipe
Equipment
- Stand Mixer
- Aluminum Foil
- 9-inch Springform Pan
- 12- inch Cake Pan
Ingredients
For the Crust:
- 1 cup of finely ground almond flour
- ⅔ cup of gluten free flour I use King Arthur’s blend but you can use any gluten free flour your prefer
- ⅔ cup of powdered sugar
- 1 stick of butter I use salted sweet cream, but salted or unsalted will work, choose your preference– this is for you after all
For the Filling:
- 2 ½ lbs of cream cheese 5 packages
- 1 ½ cups of sugar
- 5 whole extra large eggs at room temperature
- 2 whole egg yolks at room temperature
- ¼ a cup of sour cream
- 1 tablespoon of grated orange zest you can use lemon or lime as well if you prefer
- 1 ½ tablespoons of vanilla extract
For the Strawberry Topping
- 1/2 cup sugar
- 1/2 cup water
- 1 tbsp. corn starch
- 1/2 cup strawberries
Instructions
Step 1: Make the Crust
- Preheat the Oven: Set your oven to 350°F (175°C).
- Mix Dry Ingredients: In a medium sized bowl, whisk together the almond flour, gluten-free flour, and powdered sugar. You may need to use a fork to break apart clumps so you have a fine consistency.1 cup of finely ground almond flour, ⅔ cup of powdered sugar, ⅔ cup of gluten free flour
- Incorporate Butter: Melt the butter (remember this is one full stick) and simply mix the dough together. As you slowly work the butter in, either with a fork or your hands, the dough will form a ball of almost Play-Doh® consistency.1 stick of butter
- Press into the Pan: Transfer the dough to your 9-inch springform pan with a removable bottom. Evenly press it into the bottom and sides of the pan. Tip: Unlike with a tart this crust doesn't need to be perfect. You can press the edges first instead to ensure that you have roughly an inch and a half of crust around the pans sides. Then using the fork, you are going to dock the dough. Prick holes across the bottom of the dough. This allows steam to escape while baking so the dough doesn't puff up– ensuring a more even and level shell.
- Bake: Bake in oven on center rack at 350℉ for 10-12 minutes (because the cheesecake will be in the oven for quite a while you don’t need to bake the shell for quite as long), or until lightly golden. Remove from the oven and let it cool while preparing the filling. Tip: Each oven is different, the first time you bake I would recommend keeping an eye on your tart.
Step 2: Make the Filling
- Preheat the Oven: Raise the oven temperature to 450°F.
- Make the Filling: In the bowl of an electric mixer fitted with the paddle attachment, add your cream cheese and sugar. Mix on medium-high speed for about 5 minutes, until the mixture is light and fluffy.2 ½ lbs of cream cheese, 1 ½ cups of sugar
- Add the Eggs: Reduce the mixer speed to medium. Add the eggs two at a time, mixing well after each addition. Scrape down the sides of the bowl and the paddle attachment after each addition, making sure to scrape the bottom of the bowl as well. Fold mixture to fully incorporate eggs.5 whole extra large eggs, 2 whole egg yolks
- Add the Remaining Ingredients: With the mixer on low speed, add in sour cream, grated orange zest and vanilla extract. Mix until fully combined.¼ a cup of sour cream, 1 tablespoon of grated orange zest, 1 ½ tablespoons of vanilla extract
- Pour the Filling: Pour the filling into the cooled crust (in the springform pan).
Step 3: Bake the Cheesecake
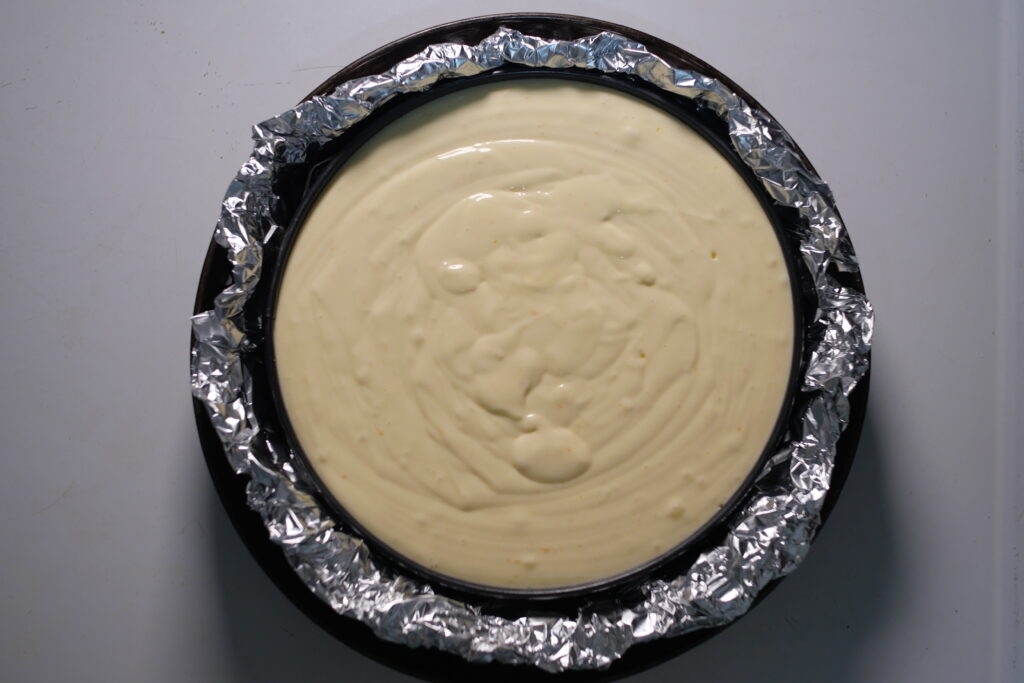
- Water Bath: Before placing your cheesecake in the oven, set your springform pan gently on a large sheet of aluminum foil. Carefully wrap the foil around the sides of the pan to prevent water from leaking in (see photo above). Then, place the foil-wrapped springform pan into a larger cake pan (the one we used is a 12 inch cake pan). Fill the pan with water until it reaches about 1½ inches up the sides of the springform pan.
- Initial Bake: Transfer the cheesecake, water bath and all, into the oven on the middle rack. Bake at 450°F for 15 minutes.
- Reduce Heat and Continue Baking: Lower the oven temperature to 225°F. Continue baking for 1 hour and 15 minutes.
- Cool the Cheesecake Slowly. Turn the oven off. Open the oven door all the way. Leave the cake inside the oven for 30 minutes (The center will still look slightly soft—this is normal).
- Cool at Room Temperature: Remove the cheesecake from the oven. Let it sit at room temperature for 2 to 3 hours, until completely cooled.
- Refrigerate Overnight: Once cooled, wrap the pan with plastic wrap or foil. Refrigerate the cheesecake overnight.
Step 4: Add the Topping
- Crush the Strawberries: Use a blender, food processor, or even a good old-fashioned potato masher to crush the strawberries until smooth.
- Simmer: In a small saucepan over medium heat, combine the crushed strawberries and ½ cup of water. Let it simmer for about 2 minutes.
- Strain the Mixture: Remove the saucepan from heat and press the strawberry mixture through a fine mesh sieve into a bowl or measuring cup. You should end up with about 1 cup of strawberry juice.
- Thicken the Sauce: Return the juice to the same saucepan. Add the sugar and cornstarch, then stir well to combine. Cook over medium heat, stirring constantly, until the mixture thickens to a smooth, glossy sauce.
Step 5: Serve & Enjoy!
- Serve the Cheesecake: Carefully run a hot knife around the edge of the cake to loosen it. Remove the sides of the springform pan. Leave the cake on the bottom of the springform pan for serving.
Leave a Reply